In a previous article, I wrote about how to retrieve user profile information from LinkedIn over the OAuth 2.0 Authorization Code Grant type. This article explains the same flow which you can follow for retrieving user resources from Facebook. (By the time of this writing, the latest Facebook API is 2.8 and the steps given below are tested on that)
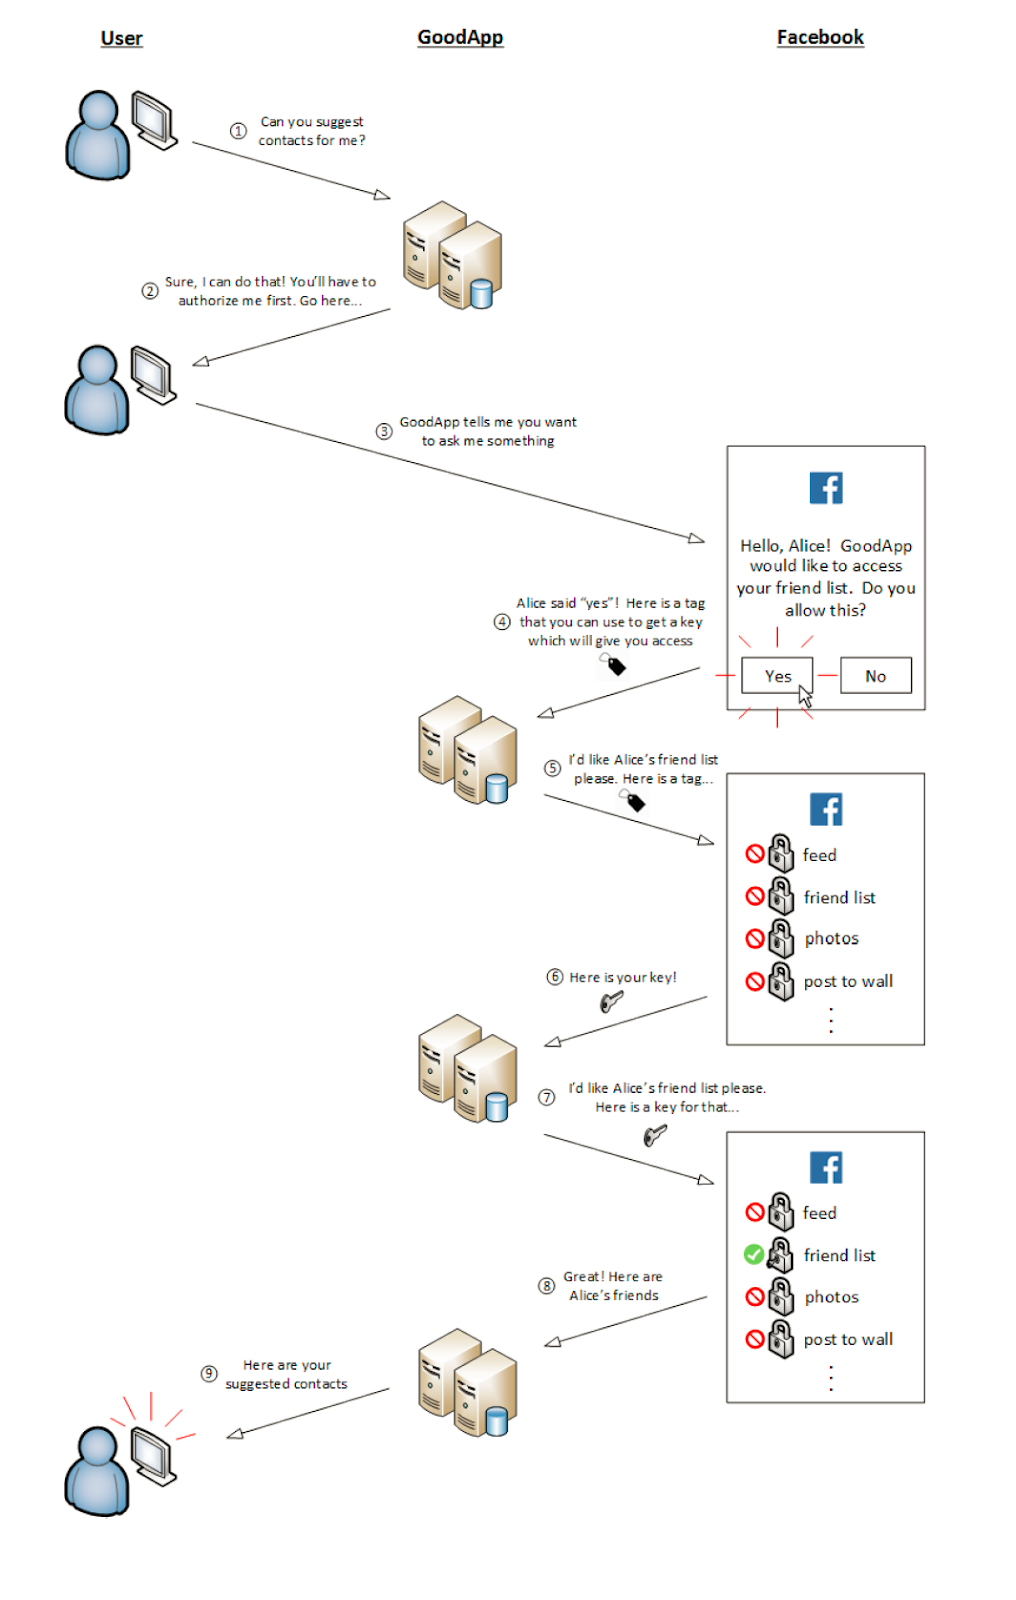
So let’s get started ! The following diagram shows all the steps associated in this flow.
Step 1 - Registering the Client App in Facebook Developer Website
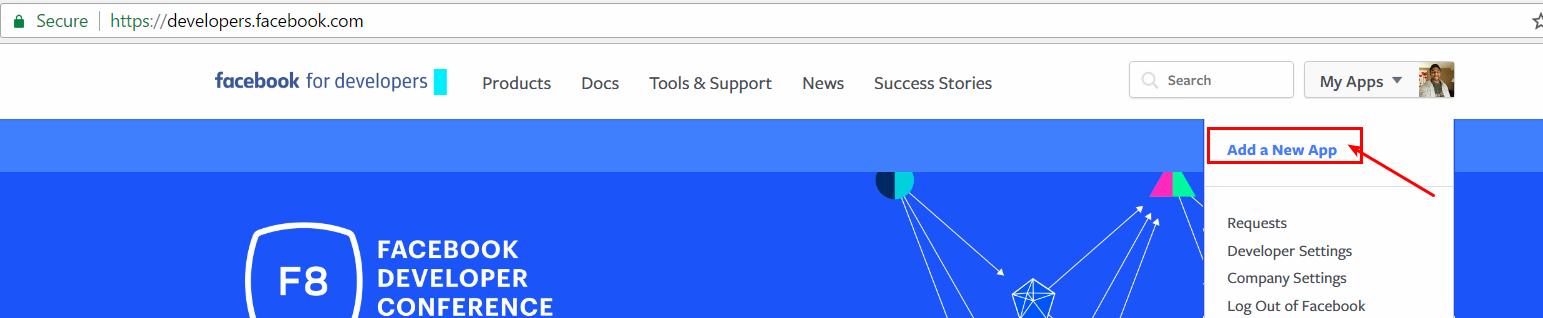
First step is to create an application in the developer account on Facebook. Visit https://developers.facebook.com/ and add a new application.
Provide a display name for your application and your contact email and create the application.

Once your app is created, associate “Facebook Login” with it.

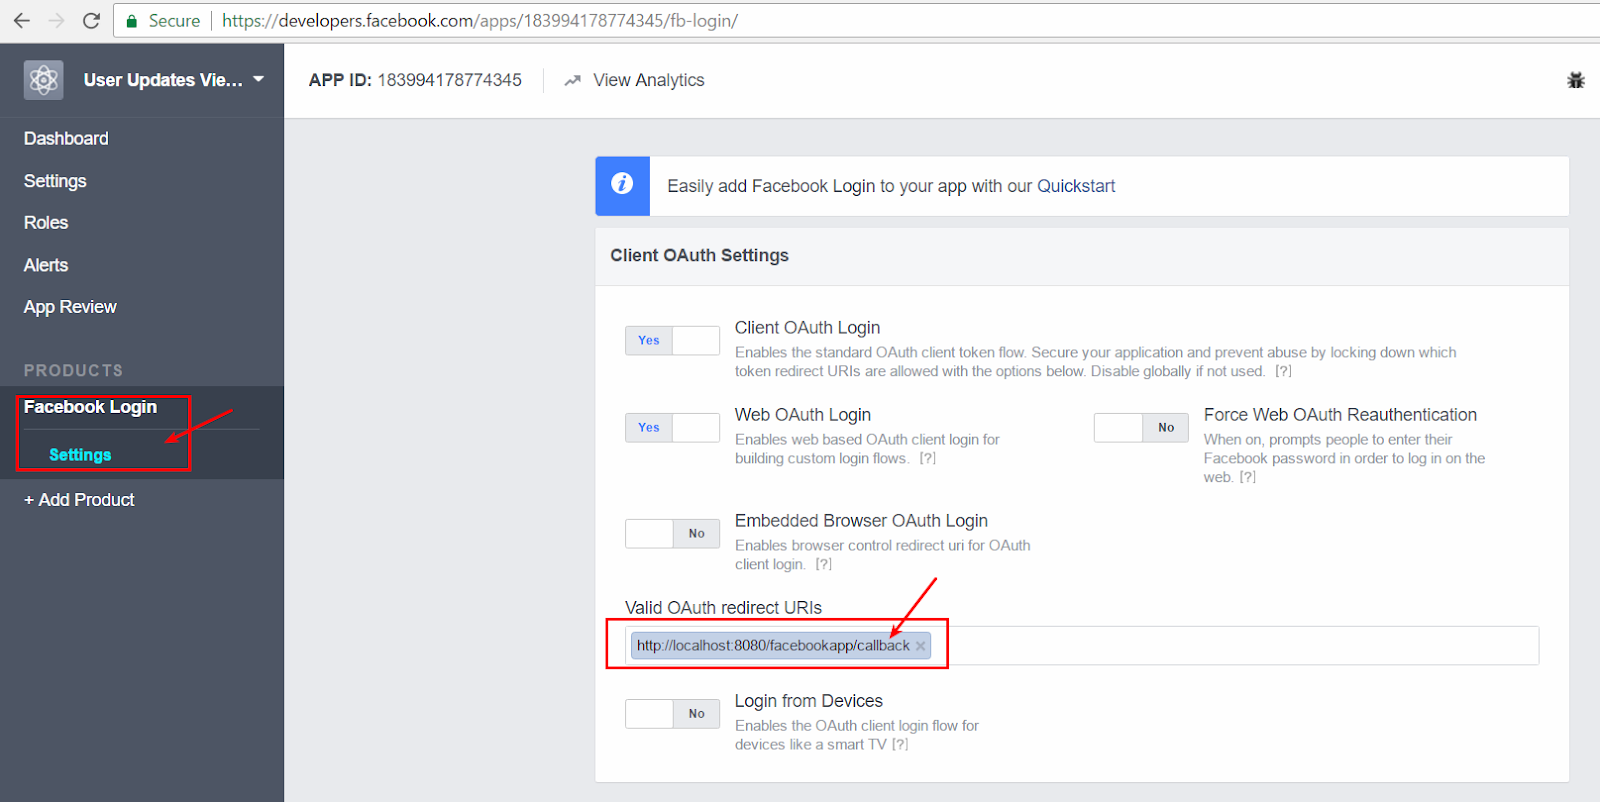
Under the Settings of the “Facebok Login”, you need to provide the Redirection Endpoint URL. This URL should be within your client web application and Facebook will send all responses to this URL. However, for trying out this flow, you don’t need to have a working URL available. You can simply provide a dummy URL here for the moment. The same URL you add here should be sent along with requests in next steps.
In the Dashboard, you can see the App ID and the App Secret for your app. In OAuth terminology, we call the same as Client ID and Client Secret, or Consumer Key and Consumer Secret.
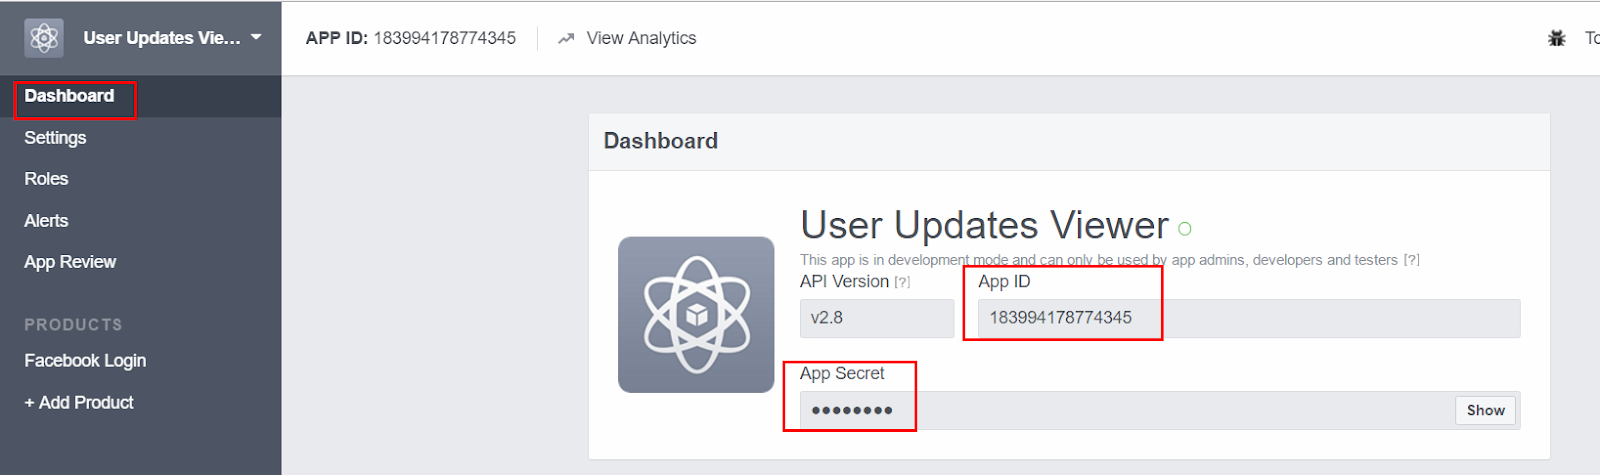
Now we have successfully registered our app in facebook and configured it. You need to take down the App ID and App Secret which is generated for your app and also the Redirection Endpoint URL which you defined where we will use these three values in next steps when making requests to facebook for retrieving user resources.
Step 2 - Obtaining the Authorization Code
In order to obtain the authorization code from facebook, we need to send a HTTP GET request to the Authorize Endpoint of Facebook, which is https://www.facebook.com/dialog/oauth . Along with the request, you need to send several parameters which are described below.
Parameter Name
|
Value
|
response_type
|
code
|
client_id
|
The App ID value of your application
|
redirect_uri
|
The Redirection Endpoint URL which you defined in “Facebook Login” settings. This value should be URL encoded when sending with the request.
|
scope
|
The scopes (permissions to resources) which your app needs to access. When you have multiple scopes, separate them with spaces and the string should be URL encoded when sending with the request. Refer https://developers.facebook.com/docs/facebook-login/permissions to know more about Facebook scopes.
|
These are the sample values I use. When trying out this, you need to add your own App ID and App Secret. (may be the redirect_uri too). As the scopes (permissions for the app to access Facebook user resources), I define few here, but you need to pick the scopes you need depending on the requirements of your client app based on the resources of the user which it needs to access.
Parameter Name
|
Sample Value
|
URL Encoded Value
|
response_type
|
code
|
code
|
client_id
|
183994178774345
|
183994178774345
|
redirect_uri
|
http%3A%2F%2Flocalhost%3A8080%2Ffacebookapp%2Fcallback
| |
scope
|
public_profile user_posts user_friends user_photos
|
public_profile%20user_posts%20user_friends%20user_photos
|
Based on above values, I prepare the following URL and since this is a HTTP GET request, I have added all parameters as query parameters in the URL. You need to put your own values in this URL (values highlighted). Then I can simply call this URL in the browser.
Sample Request :
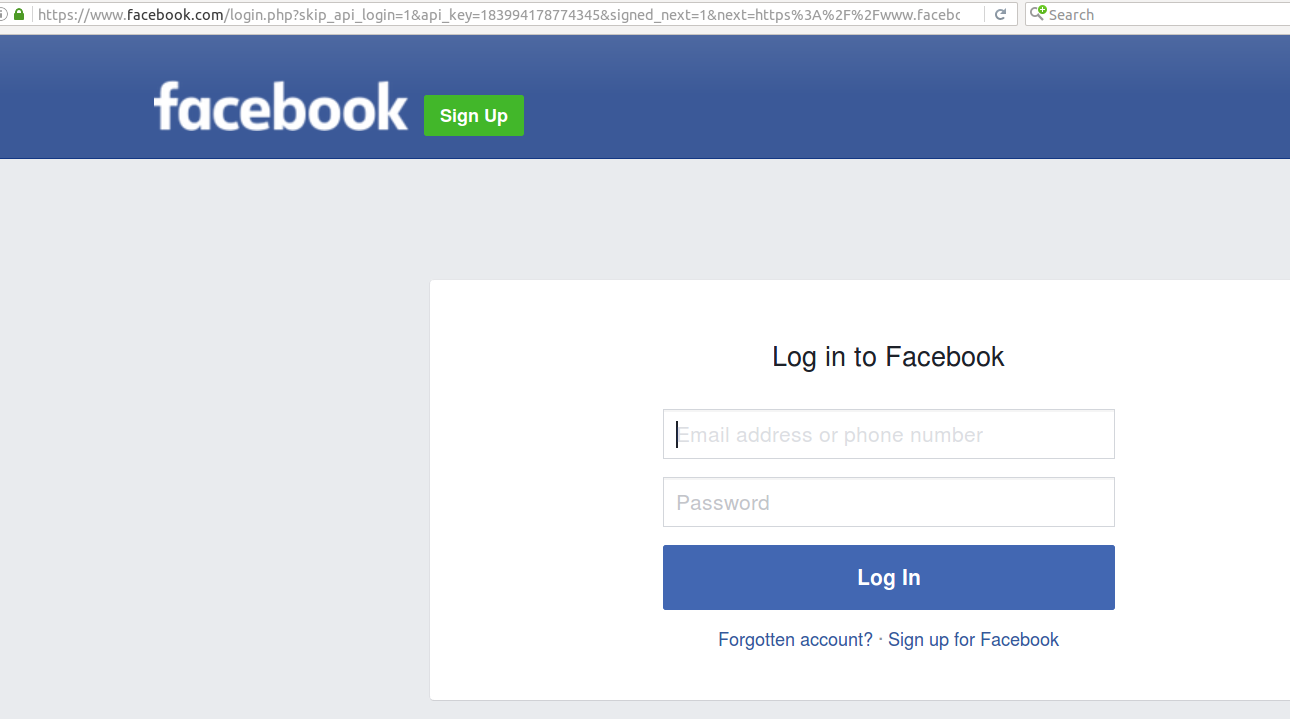
If you are not logged into facebook in the browser, first it will ask you to login.
Once you login, it will show the following popup. We call this as the “User Consent Page” in OAuth terminology. In there, it will show what are the resources from the user account that this external app would be able to access on behalf of you.
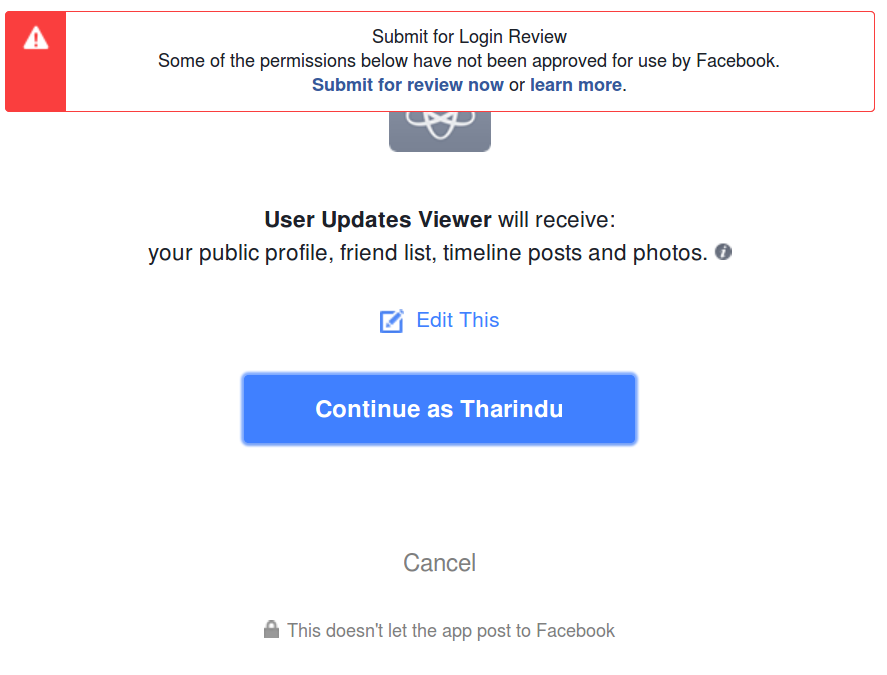
Once you Continue, facebook will redirect the browser to the Redirection Endpoint URL which you defined in the app settings and along with the URL, it will send the query parameter code, which is the authorization code. If you had a client website, you can extract this parameter value from the webapp itself.
At the moment, I don’t have a client web application, but defined a dummy URL as the Redirection Endpoint URL, so that in the browser I will not see a web page. But I can simply manually extract the authorization code value received in the URL.

Following is the URL I got in the browser.
http://localhost:8080/facebookapp/callback?code=AQDfw1CLKYt-TuoGq1m8oChT8LHbWxz01zWgmkdxRRodgJua5TbEI_HMYHaL-64LzpL56KCfNz12Yt3WXlIeep4t0Mc9VCQ9-i7SPEIk7gPSmzy4m3fpNawmQCvtw5FEU6pM0ON8EMDv-6Vp1-ty907V4Cnu5sp__QTuJ2c9wz9Co1GIrOO3qEF2Vu9ruaKkMhZDSNAa0fgbd-5PLiivkN75nr7nsFCHlJEkadBfkIVddJTqd4AH7zc8KFXWta87KA3Kt3Taz7h0lTJff3wQuciWRqhvytOpE90snQPyNJkitpaQeX3VSLHeLd77QOKMNUGw2TnMr6B9d-Y6AZx1M-Of6MeQmeogsyhE0QzihAI6eQ#_=_
So from the above URL, the authorization code value is the value of the code parameter (highlighted).
Step 3 - Obtaining the Access Token
Now that we have got the authorization code, next step is to request an OAuth access token from facebook, which can be used to access user resources (permitted with the scopes which we requested). For that, the client web application has to send a HTTP POST request to the Token Endpoint of facebook sending the authorization code received in previous step. The Token Endpoint of facebook is https://graph.facebook.com/oauth/access_token .
Since we don’t have a client web application running, we can manually do this and obtain the access token.
We need to send the following parameters in the body of the HTTP POST request.
Parameter Name
|
Value
|
grant_type
|
authorization_code
|
client_id
|
The App ID value of your application
|
redirect_uri
|
The Redirection Endpoint URL which you defined in “Facebook Login” settings. This value should be URL encoded when sending with the request.
|
code
|
The authorization code you received in previous step.
|
In addition to that, we need to send credentials of the facebook application (App ID and App Secret) in the HTTP Header. Here, we need to combine the App ID and Secret separating them in a Colon (:) and the value should be encoded in Base64.
Authorization: Basic <Base64encode(AppID:AppSecret)>
These are the sample values I use. You need to use your own parameter values when sending the request.
Parameter Name
|
Sample Value
|
URL Encoded Value
|
grant_type
|
authorization_code
|
authorization_code
|
client_id
|
183994178774345
|
183994178774345
|
redirect_uri
|
http%3A%2F%2Flocalhost%3A8080%2Ffacebookapp%2Fcallback
| |
code
|
AQDfw1CLKYt-TuoGq1m8oChT8LHbWxz01zWgmkdxRRodgJua5TbEI_HMYHaL-64LzpL56KCfNz12Yt3WXlIeep4t0Mc9VCQ9-i7SPEIk7gPSmzy4m3fpNawmQCvtw5FEU6pM0ON8EMDv-6Vp1-ty907V4Cnu5sp__QTuJ2c9wz9Co1GIrOO3qEF2Vu9ruaKkMhZDSNAa0fgbd-5PLiivkN75nr7nsFCHlJEkadBfkIVddJTqd4AH7zc8KFXWta87KA3Kt3Taz7h0lTJff3wQuciWRqhvytOpE90snQPyNJkitpaQeX3VSLHeLd77QOKMNUGw2TnMr6B9d-Y6AZx1M-Of6MeQmeogsyhE0QzihAI6eQ#_=_
|
In the HTTP Headers, I need to add the Authorization header with the App credentials. For that I can prepare the value like this.
App ID = 183994178774345
App Secret = dc321ebea29283cd4092b6b476ccadbd
AppID:AppSecret = 183994178774345:dc321ebea29283cd4092b6b476ccadbd
Base64(AppID:AppSecret) = MTgzOTk0MTc4Nzc0MzQ1OmRjMzIxZWJlYTI5MjgzY2Q0MDkyYjZiNDc2Y2NhZGJk
So, I can add the header as following.
Authorization: Basic MTgzOTk0MTc4Nzc0MzQ1OmRjMzIxZWJlYTI5MjgzY2Q0MDkyYjZiNDc2Y2NhZGJk
When sending the request, I can use a HTTP Client browser plugin like RESTClient.

In the Response, we receive the Access Token.

Alternatively, you can do the same in the Terminal with curl command. You can replace the highlighted values with your own ones.
curl -X POST --header "Authorization: Basic MTgzOTk0MTc4Nzc0MzQ1OmRjMzIxZWJlYTI5MjgzY2Q0MDkyYjZiNDc2Y2NhZGJk" --data "grant_type=authorization_code&redirect_uri=http%3A%2F%2Flocalhost%3A8080%2Ffacebookapp%2Fcallback&client_id=183994178774345&code=AQDfw1CLKYt-TuoGq1m8oChT8LHbWxz01zWgmkdxRRodgJua5TbEI_HMYHaL-64LzpL56KCfNz12Yt3WXlIeep4t0Mc9VCQ9-i7SPEIk7gPSmzy4m3fpNawmQCvtw5FEU6pM0ON8EMDv-6Vp1-ty907V4Cnu5sp__QTuJ2c9wz9Co1GIrOO3qEF2Vu9ruaKkMhZDSNAa0fgbd-5PLiivkN75nr7nsFCHlJEkadBfkIVddJTqd4AH7zc8KFXWta87KA3Kt3Taz7h0lTJff3wQuciWRqhvytOpE90snQPyNJkitpaQeX3VSLHeLd77QOKMNUGw2TnMr6B9d-Y6AZx1M-Of6MeQmeogsyhE0QzihAI6eQ#_=_" https://graph.facebook.com/oauth/access_token
|
In the response, the access token is received.
Step 4 - Retrieving User Resources from Facebook, providing the Access Token
You can refer the Facebook Graph API Reference [3] to get to how to retrieve user resources. However, I am listing down few sample requests for you to try out.
Now that we have received the OAuth access token from facebook, in all the requests we make to the facebook API, we need to include it as a HTTP header.
Authorization: Bearer <access token value>
Retrieving user’s timeline posts
Send a HTTP GET request to https://graph.facebook.com/v2.8/me/feed?limit=25 and in response, you will get the user’s timeline posts. You will get a JSON response. You can limit the number of results using the limit query parameter.

Get User’s Facebook ID
For invoking many operations like retrieving user’s photos, albums etc. We need to know the user’s facebook ID. For that, we can send a HTTP GET request to the URL https://graph.facebook.com/v2.8/me?fields=id which would return the ID in a JSON response.
{
"id": "1021167613XXXXXXX"
}
Get User’s Friend List
For retrieving the friend list of the user, you need to send a HTTP GET request as following.
https://graph.facebook.com/v2.8/<FB User ID>/taggable_friends
For this, you need to know the user’s facebook ID which we can get to know following the previous step I mentioned.

Retrieving User’s Photo Album Details
For this, you need to send a HTTP GET request to https://graph.facebook.com/v2.8/me/albums which would return a JSON response with the photo album details.

Retrieving Photos of an Album
From previous step, we can get to know the album IDs and we can use them to get the details of the photos in a particular album. For that, you need to send a HTTP GET request to following URL. In the response, you receive IDs of all photos in the album as a JSON response.
https://graph.facebook.com/v2.8/<album_id>/photos

Retrieving a Photo by ID
Now that we know the ID of a photo from previous step, we can get the details of it by sending a HTTP GET request as following.
https://graph.facebook.com/<photo ID>/picture
In the response, we receive the image.
These are few operations only, but you can do many things referring the Facebook API reference.
References
Tharindu Edirisinghe (a.k.a thariyarox)
Independent Security Researcher
No comments:
Post a Comment