WSO2 Identity Server can act as a SAML Identity Provider for any SAML based relying party application. In this article, I’ll be providing all necessary steps for configuring Facebook Workplace to use WSO2 Identity Server for SAML based single sign on. After setting this up, the users in a Facebook Workplace can successfully login to their workplace through WSO2 Identity Server over SAML 2.0 protocol.
Creating Facebook Workplace
The, you can provide your business email address and create the Facebook Workplace for your organization.
Then you will receive an email to the business email you gave in above step with a confirmation code. You need to enter that correctly to proceed further.
Then you need to fill your personal details and business organization details to continue.
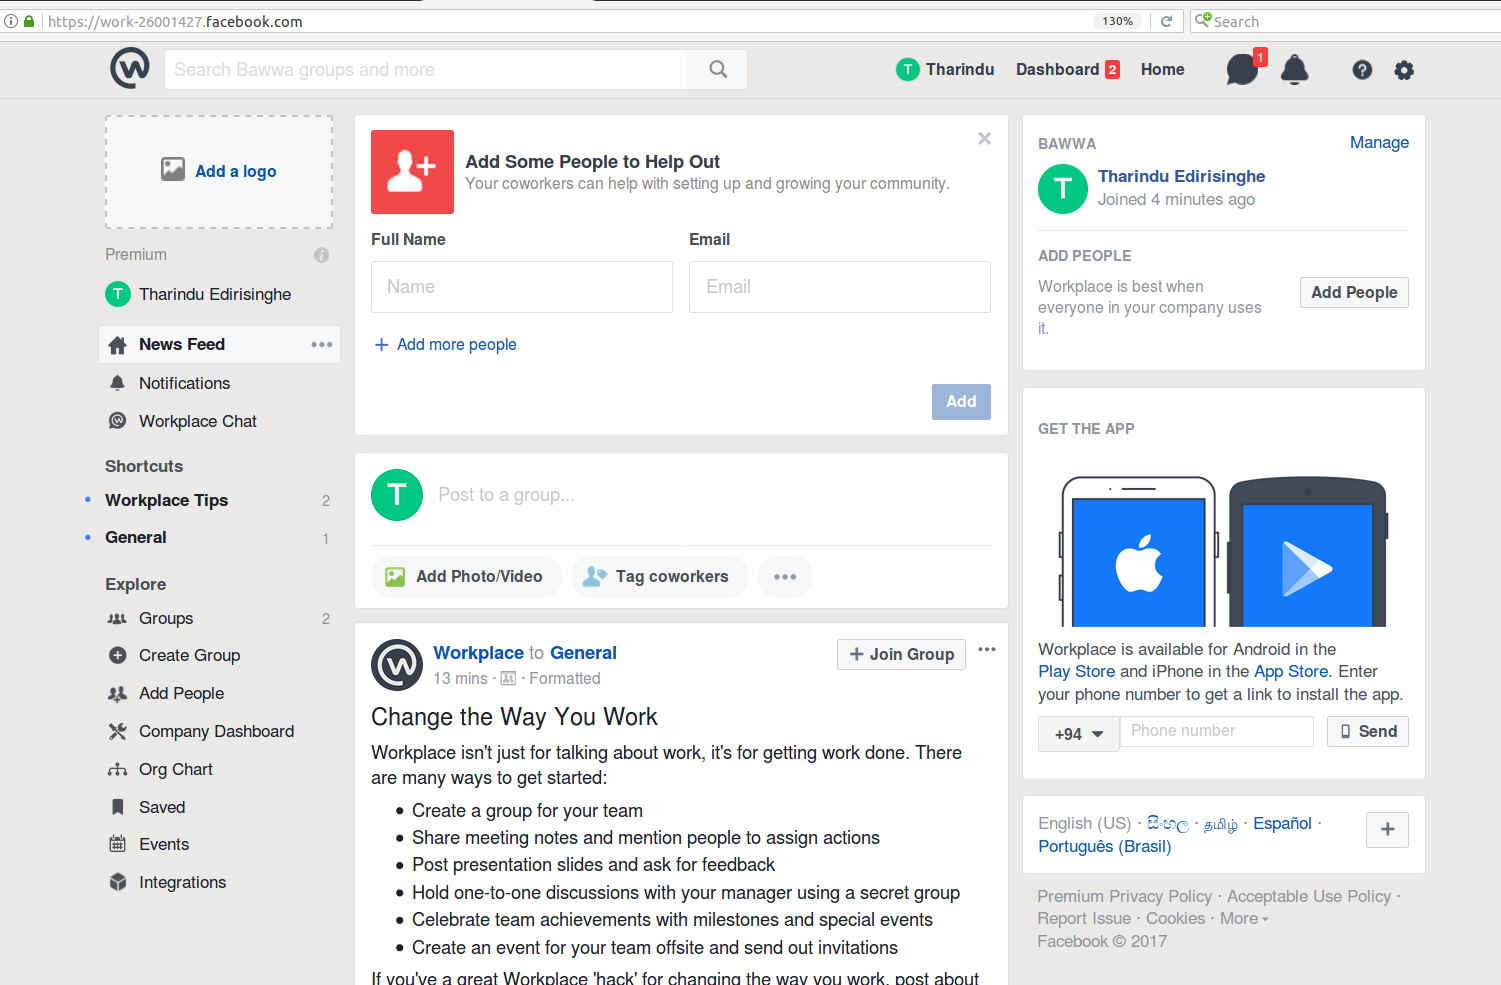
The, you can add your co-workers to the workplace by providing their email addresses. I’m going to skip this step at this moment.
Now we have successfully setup the Facebook Workplace. The account that we are using now is the system administrator account.
Configuring SAML Authentication in Facebook Workplace
Next step is to configure the SAML authentication for Facebook Workplace. Here, FB Workplace acts as a SAML relying party.
Click on the ‘Dashboard’ from the top menu and then click on ‘Authentication’ link from the left menu panel. Then, click on ‘Get Started’.
The following image has the sample configuration that I am using.
For “Coworker Authentication” field, select “SSO” option from the dropdown.
For “SAML URL”, you need to enter the SAML SSO endpoint of WSO2 Identity Server. It’s https://<server>:<port>/samlsso. Here, if you run the Identity Server locally, still you cannot use ‘localhost’ as Facebook does not allow that. Therefore I am using my localhost IP Address 127.0.0.1 here where my URL is https://127.0.0.1:9443/samlsso .
Then for “SAML Issuer URI”, you need to enter the Identity Provider Entity ID value. By default, Identity Server’s Resident IDP’s IDP Entity ID value is ‘localhost’. So I’m going to use the same value for SAML Issuer URI. You have freedom to change this accordng to your requirement.
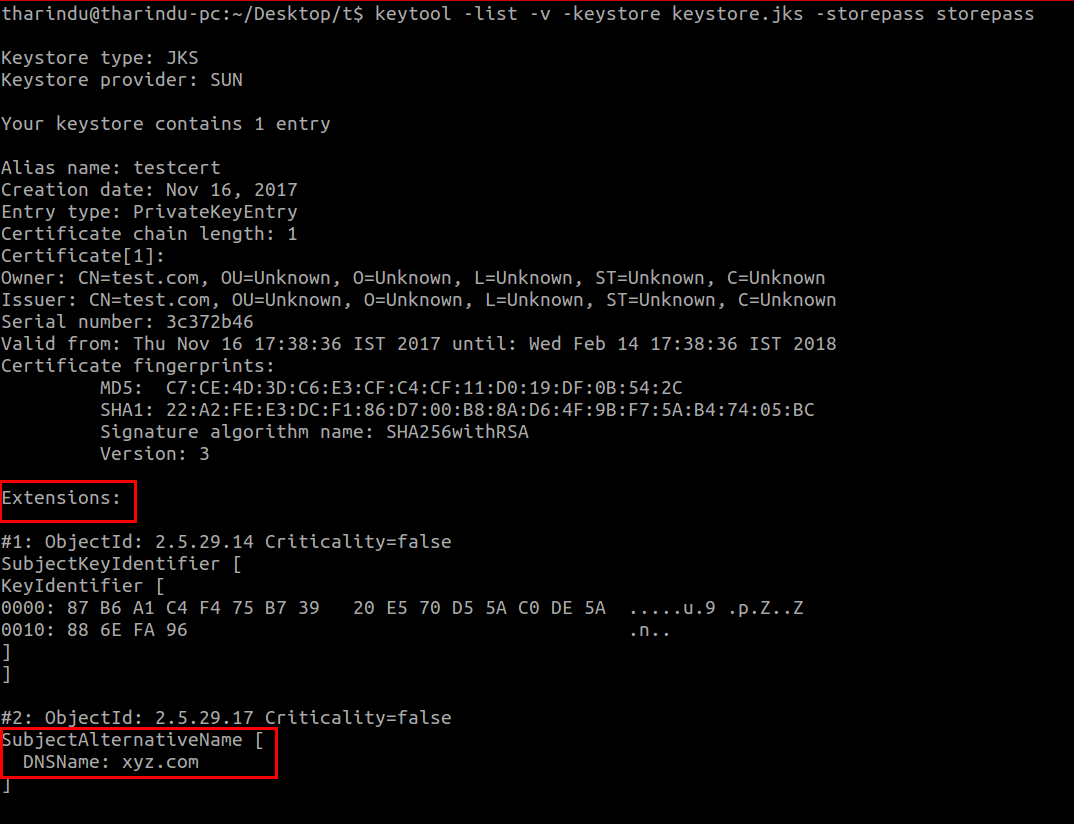
Next field is “SAML Certificate”. Here, we need to give the public certificate of WSO2 Identity Server.
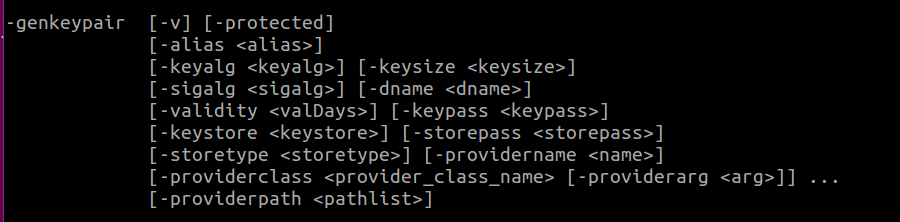
We can obtain this by going into the <IS_HOME>/repository/resources/security directory and executing the following keytool command against the keystore file which is used for storing the certificates.
keytool -exportcert -alias <alias of certificate> -keypass <private key password> -keystore <keystore file> -storepass <keystore password> -rfc -file <name of output file>
Example command for exporting default certificate of WSO2 Identity Server
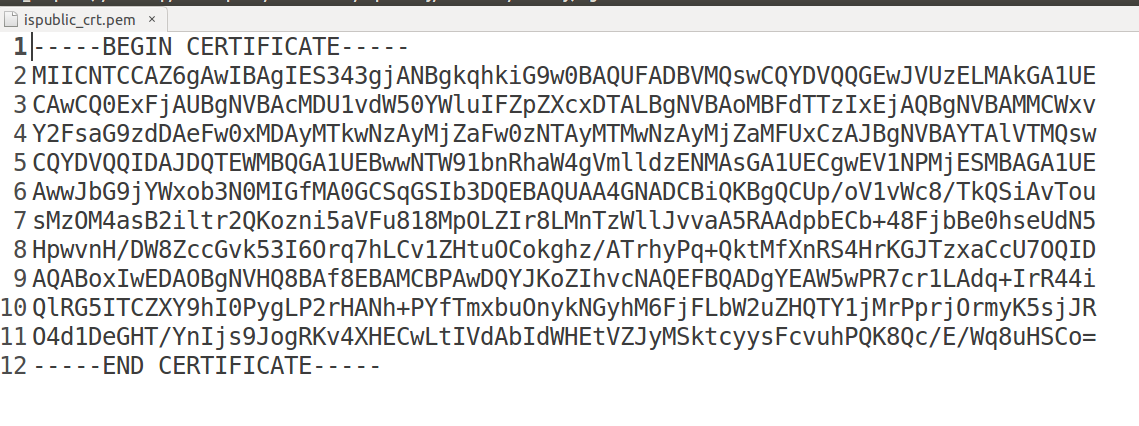
keytool -exportcert -alias wso2carbon -keypass wso2carbon -keystore wso2carbon.jks -storepass wso2carbon -rfc -file ispublic_crt.pem
|
Then in the file it outputs, it will have the public certificate. You need to copy all the text in it and paste in “SAML Certificate” field in FB Workplace.
Then in the “SAML Configuration” section, it lists the following details.
Audience URL
https://www.facebook.com/company/XXXXXXXXXXXXXXXX
Recipient URL
https://work-XXXXX.facebook.com/work/saml.php
ACS (Assertion Consumer Service) URL
https://work-XXXXX.facebook.com/work/saml.php
|
Above URLs are useful when we create the service provider configuration in WSO2 Identity Server. We cannot “Test SSO” or “Save” the configuration in Facebook Workplace until we configure WSO2 Identity Server properly to authenticate the requests coming from FB Workplace.
Configuring WSO2 Identity Server
Next step is to add Facebook Workplace as a Service Provider (relying party) in Identity Server. For that, in the Management Console of Identity Server, go to “Service Providers” in the “Main” menu and click on “Add”. As the name of the Service Provider, you can give any name. Then register the service provider.
Here, Facebook Workplace which is the relying party application, talks to Identity Server via SAML protocol. So, next step is to add the SAML related configuration in the service provider configuration. For that, Expand the “Inbound Authentication Configuration” of the service provider configuration and then under “SAML 2 Web SSO Configuration”, click on “Configure” button.
Then we need to add SAML related configuration as shown in the image below.
I am enabling “Response Signing” and then Identity Server will sign the SAML response given to FB Workplace by the private key of Identity Server. Then FB Workplace can verify that from the public certificate of Identity Server which we already have configured.
By enabling the “Attribute Profile”, I can include user’s profile attributes in SAML response.
I am enabling audience restriction and recipient validation giving the “Audience URL” and “Recipient URL” of Facebook Workplace’s SAML configuration.
After adding the configuration, save it and then click on the “Update” button of the Service Provider configuration as shown below.
In addition to the above configuration, we need to set the”Claim Configuration” as well in the service provider configuration in Identity Server. There, in the “Subject Claim URI”, we need to add the Email Address claim, which is http://wso2.org/claims/emailaddress. Then, when Identity Server gives the SAML response to FB Workplace, in the SAML assertion, the subject will have the user’s email address value. Facebook Workplace requires the Identity Provider to send the authenticated user’s email address as the subject of the SAML Assertion.
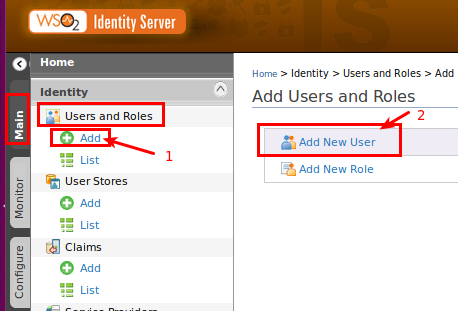
Creating a User in Identity Server for Testing the Authentication Flow
For testing the authentication flow, let’s create a new user in Identity Server. You can add a new user from the Management Console.
Give the username and password for the new user.
Then, edit the newly created user’s profile.
In the profile, filling the email address attribute is important. When Identity Server generates the SAML Response, in the SAML Assertion’s subject, this email address will be added when we login from this user account. Also, the same email address must be already added as a user in Facebook Workplace.
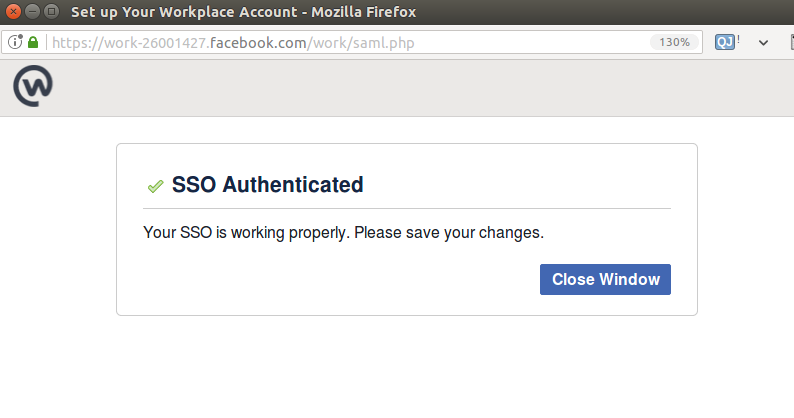
Testing SAML Configuration in Facebook Workplace
Now we have configured Identity Server as a SAML Identity Provider for Facebook Workplace.
For testing if the configuration in Identity Server and Facebook Workplace are correct, click on the “Test SSO” button in FB Workplace’s authentication configuration.
Then it will open a new browser window and show the SSO login page of WSO2 Identity Server. Here we can enter the newly created user’s credentials.
Then, Identity Server will send the SAML response to FB Workplace and you will see that user is successfully authenticated to FB Workplace as well.
Now you can save the Facebook Workplace SAML authentication configuration as the flow is working.
After that, you can try the end to end flow by visiting the FB Workplace URL. (eg: https://COMPANY_SUBDOMAIN.facebook.com). Now you can see that it will show the optoin “Log in with SSO” because we have now enabled SSO for FB Workplace using WSO2 Identity Server. Once you click this button, it will show the Identity Server login page where you can login to Identity Server from the user account created there and then finally you will be automatically logged into FB Workplace too.
Troubleshooting
If any make any mistakes when configuring this scenario, when testing the SSO login, you will most probably see the following error message in FB Workplace. There is no logs or some console in FB Workplace yet for identifying the exact issue for getting this to work.
So, you can use a browser plugin like SSO Tracer to trace the SAML request going from FB Workplace to Identity Server.
<samlp:AuthnRequest xmlns:samlp="urn:oasis:names:tc:SAML:2.0:protocol"
xmlns:saml="urn:oasis:names:tc:SAML:2.0:assertion"
ID="ONELOGIN_f11ce7039b3ce9fcb6e3a25d2803c09a5a399271"
Version="2.0"
IssueInstant="2017-11-08T11:51:14Z"
Destination="https://127.0.0.1:9443/samlsso"
ProtocolBinding="urn:oasis:names:tc:SAML:2.0:bindings:HTTP-POST"
AssertionConsumerServiceURL="https://work-xxxxx.facebook.com/work/saml.php"
>
<saml:Issuer>https://www.facebook.com/company/XXXXXXXX</saml:Issuer>
<samlp:NameIDPolicy Format="urn:oasis:names:tc:SAML:1.1:nameid-format:emailAddress"
AllowCreate="true"
/>
</samlp:AuthnRequest>
|
There’s nothing special in the SAML Request. Only thing is we can see the SAML Issuer value here. In Identity Server side, inside the Service Provider configuration’s SAML configuration, the SAML Issuer must have the same value as this one.
Then you can get the SAML Response from the tracer which is sent by Identity Server to FB Workplace. Here’s an example. The important fields are highlighted.
<saml2p:Response Destination="https://xxxxxx.facebook.com/work/saml.php"
ID="_23428a8650d533cb06b041e8d97ef5ac"
InResponseTo="ONELOGIN_f11ce7039b3ce9fcb6e3a25d2803c09a5a399271"
IssueInstant="2017-11-08T11:51:15.524Z"
Version="2.0"
xmlns:saml2p="urn:oasis:names:tc:SAML:2.0:protocol"
>
<saml2:Issuer Format="urn:oasis:names:tc:SAML:2.0:nameid-format:entity"
xmlns:saml2="urn:oasis:names:tc:SAML:2.0:assertion"
>localhost</saml2:Issuer>
<saml2:Subject>
<saml2:NameID Format="urn:oasis:names:tc:SAML:1.1:nameid-format:emailAddress">[email protected]</saml2:NameID>
<saml2:SubjectConfirmation Method="urn:oasis:names:tc:SAML:2.0:cm:bearer">
<saml2:SubjectConfirmationData InResponseTo="ONELOGIN_f11ce7039b3ce9fcb6e3a25d2803c09a5a399271"
NotOnOrAfter="2017-11-08T11:56:15.524Z"
Recipient="https://work-xxx.facebook.com/work/saml.php"
/>
</saml2:SubjectConfirmation>
<saml2:SubjectConfirmation Method="urn:oasis:names:tc:SAML:2.0:cm:bearer">
<saml2:SubjectConfirmationData InResponseTo="ONELOGIN_f11ce7039b3ce9fcb6e3a25d2803c09a5a399271"
NotOnOrAfter="2017-11-08T11:56:15.524Z"
Recipient="https://work-xxx.facebook.com/work/saml.php"
/>
</saml2:SubjectConfirmation>
</saml2:Subject>
<saml2:AudienceRestriction>
<saml2:Audience>https://www.facebook.com/company/XXX</saml2:Audience>
<saml2:Audience>https://www.facebook.com/company/XXX</saml2:Audience>
</saml2:AudienceRestriction>
</saml2:AuthnStatement>
</saml2:Assertion>
</saml2p:Response>
|
In the Destination parameter, it should have the ACS URL of FB Workplace.
As the Issuer value, it has the Identity Server’s Resident IDP’s Entity ID Value. This should be matching to the value you have put in “SAML Issuer URI” field of SAML configuration in FB Workplace.
The Subject’s NameID format should be urn:oasis:names:tc:SAML:1.1:nameid-format:emailAddress and the value should be the email address of the authenticated user. This email address should already be added to FB Workplace.
The audience and recipient values should be the same URLs as in FB Workplace’s SAML Configuration.
Extra steps to be done in tenant flow
In your Identity Server deployment, you might have separate tenants for different organizations apart from the super tenant. In such case, the required configuration changes a little bit.
When comes to Identity Server’s service provider configuration, there is no change. Only thing is you need to create the service provider in the particular tenant. Also the user account/s in Identity Server should be created inside that tenant. Then, in the user’s profile, email address should be defined where the email address is already added to the Facebook Workplace.
The SAML Response given by Identity Server in the tenant flow will be signed by the private key of the particular tenant. Therefore, we need to obtain the public certificate of that tenant’s keystore and add it to Facebook Workplace as the SAML Certificate. For that, login to the management console of Identity Server as the tenant admin. Then, go to Main -> Manage -> Keystores -> List from the left menu. There you can see the tenant’s keystore. From that, click on the Public Key link to download the public certificate of the tenant.
After downloading the public certificate, you need to convert it to PEM format. For that, you can use the following command where you have to specify the downloaded file and a name for the exported PEM file.
openssl x509 -inform der -in <downloaded file> -out <outputfile.pem>
After above step, you can open the output PEM file using a text editor and then copy the public certificate value and paste in SAML Certificate field in FB Workplace.
In addition to that, the “SAML URL” field in FB Workplace should have the SAML SSO endpoint of Identity Server as following where we add the tenantDomain as a query parameter. The value of this parameter is the particular tenant’s domain name.
https://<IS_HOST>:<IS_PORT>/samlsso?tenantDomain=XXXXX
Now you can try out this flow and when the SSO login page is prompted by Identity Server, you need to enter the user credentials of a user account in the particular tenant. In terms of the SAML response, only difference is the response is signed with the private key of the particular tenant. In the subject of the SAML assertion, it will include the email address of the user, which is similar even in the super tenant flow.
Tharindu Edirisinghe
Platform Security Team
WSO2